Brewzilla Gen4 Discussion/Tips Talk

Homebrew Talk - Beer, Wine, Mead, & Cider Brewing Discussion Forum

Help Support Homebrew Talk - Beer, Wine, Mead, & Cider Brewing Discussion Forum:

This site may earn a commission from merchant affiliate links, including eBay, Amazon, and others.
FWIW, the 120V gen4 is 1500W, so there's another 900W available on a 20A 120V circuit before it's overloaded*. If you have another circuit available, you could exceed that.

*"Continuous" loads are only supposed to be 16A on a 20A circuit. Tank water heaters are considered continuous, so one might argue any tank with an element might be. You're not guaranteed that a 20A breaker won't trip if loaded over 16A for a prolonged period, particularly if the panel is somewhere hot (e.g. garage). Also, it may not trip for a while if overloaded slightly, but you may be overloading your wires. Standard (thermal-magnetic) breakers are not very precise. Best to pay attention to loads.
I've got other plugs nearby that are on a different circuit, so I've got the power, just need to determine the best heater/element to use.
 
To get my Brewzilla Gen4 working with good repeatability, I took three steps to get there. After each step I did a brew.
Step 1:
calibrate to 139f on the low side and 212 for my maintained boil.
Note; worked great using an analogue temp gauge in the mash. But, still too many over shoots.
Step 2:
Installed the HED. Worked to control better the overshoots. Note: You have to adjust settings to get it just right. Worked OK & better than without it. Still not satisfied.
Step 3:
Get the Bluetooth thermometer.
Amazed at the repeatability of results.
Once you figure out you settings for each brew you are doing, this works flawlessly to maintain proper temps. You have to figure out you element power settings & you recirculation pump percentage.

As a general note, in every step or method, the recirculation pump is critical to cut thru some of the temp gradients & smooth out your temp changes.
I ordered the HED and the Bluetooth thermometer probe a couple of days ago (not yet arrived), hoping for better control of the mash temperature. which has been quite unacceptable to date.

Regarding the thermometer, how do you get the Brewzilla to prioritize the probe temperature reading over the built-in sensor reading?
 
So in case anyone is interested - I finally got motivated enough to do a postmortem on my melted Gen4. (As a reminder - it was plugged in with the heater turned off, but after a power failure it turned the heaters on all by itself.)

Accessing the thermal cutout took a bit of work, since everything under the kettle had to be removed first.
View attachment 825735View attachment 825736
The thermal cutout probably did its job, since it failed permanently open, likely due to the extreme heat. The thermal paste connecting it to the heater plate had turned to chalk. What mystifies me is that instead of being in series with the 12V coil supply to the heater relays on the circuit board, the thermal cutout is connected only to the external controller - which happens to be the very device that suddenly decided on its own that dry firing the heaters was such a great idea.

The protective sheathing on the wires going to the heater plate is charred but it isn't crumbly under the char. The insulation on the wires underneath looks okay. (The sheath charring had a rather dramatic effect on the inside of the bottom cover plate.)
View attachment 825737View attachment 825732

I wondered if the extreme heat would have had any effect on the heater plate seal, but the kettle still holds water just fine. I'm really waffling on what to do with this thing now. Finding out that there is no warranty on defective units was an expensive surprise, so I'm hesitant to abandon it. It looks like all I would need to do to get it operational again is figure out a way to mend the melted plastic feet on the circuit board enclosure. I would also probably add a switch for the heater AC power. I doubt I'd run it unattended again after this. However the nights where I used to pre-heat the strike water were likely low risk. After losing its mind, it would have to boil away all that water before firing dry.
View attachment 825733View attachment 825734

Pillaging it for parts would gain only a pump, a ball valve and a few fittings. I'd have to abandon the deluxe lid, but I could re-use the steam condenser. It's tempting, and the modular brew rig religion has gained a new convert, but we'll see.
The thermal cutout is easy to replace, I did this after an issue with a turbo boiler ( trying to deep fry a chicken in it).
I did find out though that there was also an inline burn out fuse that I also had to change.

If the elements still work which could be tested without circuit board but direct wiring via a switch then you should be able to get it back in action.
If the electronics are all burnt out you could get a SMartPID and then wire that in.

A default to power off on the element seems a good boot up safety protection for the developers with an option to resume program / brew cycle after a physical button press.
 
I ordered the HED and the Bluetooth thermometer probe a couple of days ago (not yet arrived), hoping for better control of the mash temperature. which has been quite unacceptable to date.

Regarding the thermometer, how do you get the Brewzilla to prioritize the probe temperature reading over the built-in sensor reading?
After you have paired the BT thermometer, go back into settings and one of the options is to select the default probe. Sorry I am not next to my unit right now but the setting is pretty obvious. Just change it from Built-in to your BT thermometer
 
The thermal cutout is easy to replace, I did this after an issue with a turbo boiler ( trying to deep fry a chicken in it).
I did find out though that there was also an inline burn out fuse that I also had to change.

If the elements still work which could be tested without circuit board but direct wiring via a switch then you should be able to get it back in action.
If the electronics are all burnt out you could get a SMartPID and then wire that in.

A default to power off on the element seems a good boot up safety protection for the developers with an option to resume program / brew cycle after a physical button press.
LOL - when I first read this (too quickly), I thought you were deep frying a chicken in the BZ. Had to go back and re-read.
 
I ordered the HED and the Bluetooth thermometer probe a couple of days ago (not yet arrived), hoping for better control of the mash temperature. which has been quite unacceptable to date.

Regarding the thermometer, how do you get the Brewzilla to prioritize the probe temperature reading over the built-in sensor reading?
The Bluetooth thermometer will read the setting you put for your mash & takes over for the temp of you mash in. It overrides the built in sensor.
 
The thermal cutout is easy to replace, I did this after an issue with a turbo boiler ( trying to deep fry a chicken in it).
I did find out though that there was also an inline burn out fuse that I also had to change.

If the elements still work which could be tested without circuit board but direct wiring via a switch then you should be able to get it back in action.
If the electronics are all burnt out you could get a SMartPID and then wire that in.

A default to power off on the element seems a good boot up safety protection for the developers with an option to resume program / brew cycle after a physical button press.
I was thinking about doing that - just replacing the thermal cutout and then re-assembling everything. I was also looking at ways to turn it into an actual cutout instead of just a signal to the controller. The 3rd heater relay on the circuit board isn't used in this model, so it would be a candidate for switching the AC input line to the other two heater relays. Unfortunately the board's DC power supply gets its AC from the same input terminal as the first heater relay, and splitting those up would require some major board butchering. Alternatively, connecting the thermal cutout to something like a water heater relay would work to cut power to everything, but that would need a handful of components and its own 12V power supply. The easiest workaround would be a hard and fast rule to never plug in the G4 without liquid in the kettle and to not leave it unattended for very long.

I'm still undecided about how dodgy the heater wiring harness is after being fried. I change my mind every time I poke at it.
 
Any chance that you could repeat that top secret information here? It's locked away in a private Facebook group, making it impossible for those of us who don't want a Facebook account to get support.
Sorry triker, I didn't realize I wasn't getting notifications on this thread so only noticed your question just now.
Long story short is to just keep trying the firmware update on the BZ4 until it works, first making sure you have stable WiFi+Internet. Lots of the discussions suggest that this issue is due to users' connectivity but mine that day was rock solid and I had to try 4 or 5 times before it was successful - seems to me the current update process is/was pretty fragile but I'd rather KegLand's developers focus on other things before improving this (and it's possible they have already - my previous version was very outdated). As a "seasoned" IT guy, I'm overall pretty satisfied with their rate of progress on things.
OK, thanks for that info. I was afraid that it would turn out to be exactly that recommendation. My BZ4 fire was due to following that advice, which I found in a bug report on gitlab. I left my unit on for days near my powerful wifi AP. I also tried using my cell as a hot spot for an entirely different path to the server. If I do manage to resuscitate my BZ, I'll give the firmware update one more try (but only with water in the kettle). There was no problem with connecting to the server and the firmware appeared to be downloading before it eventually gave up. It smacks of a bug in the OTA handler in the existing firmware version, which would make it a chicken and egg problem. If a firmware image was available somewhere, I could program the ESP32 directly. That's always my back door when an OTA update messes up on any of my home automation devices. SS Brewtech devices have the ability to update firmware via a USB key. A bit clunkier, but probably more reliable.
 
I have the BZ 35 lt gen 4 ... if I remove that fine mesh bottom screen ... problem with the hop trub ? ...due to the conical shape of the bottom and central outlet for the pump and faucet ? ..I think about it because I had a problem with stuck mashing
 
I ordered the HED and the Bluetooth thermometer probe a couple of days ago (not yet arrived), hoping for better control of the mash temperature. which has been quite unacceptable to date.

Regarding the thermometer, how do you get the Brewzilla to prioritize the probe temperature reading over the built-in sensor reading?
Now after 3 brews my sensor of my bluetooth thermometer is failing. It is not that water resistant as i thought. The conection from wire and tip is bad. It leaks and is giving a fals reading. Poor quality.
 
Now after 3 brews my sensor of my bluetooth thermometer is failing. It is not that water resistant as i thought. The conection from wire and tip is bad. It leaks and is giving a fals reading. Poor quality.
That is quite concerning. Have you written to Kegland about the issue?

I just received mine an hour ago. I tried using the QC scan to download the manual and got a message - on the Kegland page itself - that the page could not be found! I believe that the item has only been out for less than a year, and already their pages don't link. Very unprofessional standards! I did do a search and found the manual on a totally different page!
 
Last edited:
That is quite concerning. Have you written to Kegland about the issue?

I just received mine an hour ago. I tried using the QC scan to download the manual and got a message - on the Kegland page itself - that the page could not be found! I believe that the item has only been out for less than a year, and already their pages don't link. Very unprofessional standards! I did do a search and found the manual on a totally different page!
No, i did not write kegland. I ordered it by ali express and don’t know if warranty call is possible.
 
I will be testing these settings this afternoon with a multistep mash. Thank you for the continued support!

Any feedback using those settings?
I am using the 220v version of the Brewzilla gen4 and mashed yesterday without PID and using the BT probe as the temperature sensor, but it didn't turn out that well for me.

Another question related to the BT probe, is there a way to export the data from that probe as well in the RAPT interface? Exports only provide me with the built-in data.
 
Brewjilla.jpeg


Hope it's still there when I get home from work!!!
 
It's Alive! And it makes beer... My melted BZ4 came back to life after I reassembled it, and I did a brew day today on it. The only alien body parts needed were new feet for the circuit board enclosure - some ugly blobs created out of JB Weld. I did order and install a new thermal cutout (using high temperature thermal paste,) even though as I discovered the hard way - the way it is configured, that part doesn't actually provide any protection.

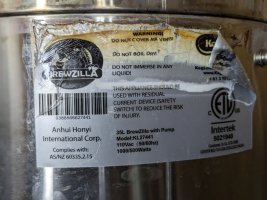
Now I just have to teach the controller to read, so that it will pay attention to the warning label about not dry firing. The controller had remembered all my settings from my last brew day, except for one rather important one - that the heater had been left turned off. As soon as it got power again, it was firing away. This time I was ready for it, and had my strike water already sitting in the kettle.

Label.jpg
 
What is the recommended power percentage when mashing? I've been getting pretty heavy temperature fluctuations at 100% (110v 9.25 gallon unit). Should I dial that back to say...50%?
 
What is the recommended power percentage when mashing? I've been getting pretty heavy temperature fluctuations at 100% (110v 9.25 gallon unit). Should I dial that back to say...50%?
I've been running 30% on the 35L 120V for various size beers and it works well. (edit: This has been with the neoprene jacket in ~65-75F ambient air, so might need some more heat at lower temps or no jacket. I find 35% overshoots a lot more, though. I'm also recircing about 50% of max flow to avoid compacting.)
 
Last edited:
I've been running 30% on the 35L 120V for various size beers and it works well.
Going to try that this weekend and see what happens. This unit is so close to being dialed in almost a year after purchase and 15-20 or so brews later lol
 
I bought the 65L Gen 4, only to find out it needs a 20amp plug. So that puts a dampener on things until I can get an electrician in!
Sometimes laundry rooms have a dedicated supply that is higher.

My Guten 70L basically the same as the brewzilla only needs a 15amp plug on 220V.
 
I did my second brew on the BrewZilla last night and the pump clogged for the second time. The drain in the middle is actually getting totally clogged, and even though I replumbed the tubes underneath to travel to the spigot first and then the pump, I can’t use the spigot to drain the kettle afterwards. I crush grain at my LHBS and this time tried a double crush because my efficiency the first time was pretty terrible but it was still bad this time around (mash efficiency was only 47%) and the malt pipe bottom + false bottom don’t seem to be stopping grain and hob debris. Anyone else have this issue? The post brew clean up takes FOREVER.
 
I did my second brew on the BrewZilla last night and the pump clogged for the second time. The drain in the middle is actually getting totally clogged, and even though I replumbed the tubes underneath to travel to the spigot first and then the pump, I can’t use the spigot to drain the kettle afterwards. I crush grain at my LHBS and this time tried a double crush because my efficiency the first time was pretty terrible but it was still bad this time around (mash efficiency was only 47%) and the malt pipe bottom + false bottom don’t seem to be stopping grain and hob debris. Anyone else have this issue? The post brew clean up takes FOREVER.
I use a GrainBag over my pipe and never have that issue. I use the same Grain Bag (after cleaning/sterilizing) when I transfer to my fermentor (catching the hop, hot and cold break), and end up with almost no trub in my fermentor. The GrainBags they make fit perfectly, and are incredibly easy to clean and are fast-drying. They can handle more than boiling temperatures.
 
Yea I have a brew bag from my stove top days and it worked great but everything I had read about the Gen4 said the malt pipe was enough to keep even heavy hop charges out of the fermenter but I’m getting clogs really easily it seems. I also read they made the false bottom a little smaller because people said it was too tight originally. So maybe that’s it?

I’m not opposed to the bag though. Are you still using the malt pipe?
The holes in the screens are too big and allow a lot of crushed grain through.

Yes, I use the pipe as it makes it much easier to do the sparge (I use a spinning sparge device that sits on the top of the pipe). It is easiest to use a grain bag that fits exactly to the outside of the pipe rather than inside it. This allows for much better circulation. It also allows both bag and pipe to be easily lifted together.

The bottom screen is definitely too tight, and mine is all bent from getting it in and out. They should mill just a fraction from the outside diameter. I don't see any need for it to fit THAT tight.
 
Last edited:
Yea I have a brew bag from my stove top days and it worked great but everything I had read about the Gen4 said the malt pipe was enough to keep even heavy hop charges out of the fermenter but I’m getting clogs really easily it seems. I also read they made the false bottom a little smaller because people said it was too tight originally. So maybe that’s it?

I’m not opposed to the bag though. Are you still using the malt pipe?
I also bought use a grain bag. It goes into the Gen 4. I tighten the bag around the outside rim of the Gen4. Then I drop the grain tun into the bag. I am able to reuse the bag 4 times depending on the hop blend I put into the bag during the 60 minute brew schedule. This method keeps everything running without a clog.
 
Yes I forgot to mention that. We generally give you a silicone tube that is longer than you require so this is definily a factor.
 
Yes I forgot to mention that. We generally give you a silicone tube that is longer than you require so this is definily a factor.
Made that mistake the first time but any time I stopped the pump I made sure to pull the tube out of the mash. The center drain was totally backed up, which I don’t think would have come from the recirc anyways.
 
Made that mistake the first time but any time I stopped the pump I made sure to pull the tube out of the mash. The center drain was totally backed up, which I don’t think would have come from the recirc anyways.
If you close the recirculation riser valve when you turn your pump off, this will prevent siphoning back to the pump.
 
Made that mistake the first time but any time I stopped the pump I made sure to pull the tube out of the mash. The center drain was totally backed up, which I don’t think would have come from the recirc anyways.
I agree that would be impossible as it would need grain to siphon through the pump. Whole husks should not be getting through mesh screen, fine particles could clump.
 
Haha good call but it’s definitely not :).

I adjusted my BrewFather profile a bit last night and may run a few more tests to tweak things like boil off rate to dial it in a bit further. Hoping that will help.

I mentioned this earlier but as suggested in the BrewZilla guide I replumbed the tubing to go first to the spigot and then the pump, so the spigot would still be usable if the pump got jammed. I’m wondering if the double crush was just too fine, so I’ll probably try a single crush again next time and also avoid the recirc arm suck back.
 

Latest posts

Back
Top